Friday, December 31, 2010

Black Eyed Peas with Pork and Greens – Good Luck with This!

I love the New Year's day tradition of eating beans and greens to bring luck and prosperity. This video was posted a few years back, and features black-eyed peas, and not one, but three kinds of pork. How can that not bring good fortune?

This is a very old tradition, and I don't mean colonial America old
, I mean really, really old. There are records of black-eyed peas being eaten for good luck on New Year's Day all the way back to ancient Babylonia. It must have worked, because look at all the good fortune that has befallen the middle east since then. Okay, maybe that's not the best example.

This video recipe is my variation on something called "Hoppin' John," which is black-eyed peas, rice, and pork stewed together, usually served with some kind of greens and cornbread. Speaking of which, I highly suggest clicking on my cornbread recipe video and doing this thing right.

I want to wish you all a Happy New Year! May your 2011 be filled with much happiness, and lots of new adventures. Stay safe, party hard, and as always, enjoy!


Ingredients:
1 pound black-eyed peas, soaked overnight
3 strips bacon, sliced in 1/2-inch pieces
1 pound pork neck bones
6 oz smoked ham, diced
1 cup diced onion
1 cup diced celery
1 cup diced carrot
3 cloves chopped garlic
6 cups water
1 (10-oz can) diced tomato with green chilis
1 tsp salt
1 bay leaf
1/2 tsp cumin
1/2 tsp black pepper
cayenne to taste
1 tsp dried thyme
1 large bunch kale, leaves torn
cooked rice

Thursday, December 30, 2010

Doing the Limbo

For me, this time between Christmas and New Years is the laziest week of the year. Many are off work, and those that aren't are probably doing a half-assed job anyway. Generally people are tired, distracted, and really not into any heavy thinking. This is exactly how I feel. 

Anyway, to help make up for this just-phoned-it-in post, I will say that I have so many exciting things planned for the new year, including a video on how to do your own sous vide steaks at home (my first test pictured here), using absolutely no special equipment. Spoiler alert: it was awesome. Stay tuned!

Wednesday, December 29, 2010

When it Comes to Beef, I Usually Leave Wellington Alone

Photo (c) David Blaine's Flickr Photostream
I get lots of requests for Beef Wellington, especially around the holidays. In case you don't know, Beef Wellington is a whole tenderloin of beef, covered in foie gras pate, coated with a rich mushroom paste, wrapped in buttery puff pastry and baked to a golden brown. Sound good doesn't it? That's the problem.

The idea of Beef Wellington is amazing, and the aforementioned list of ingredients is spectacular together, but I've always considered the actual dish more of a risky showpiece than anything else.

I can sear a filet mignon steak, top it with mushrooms and foie gras, serve it on or near some perfectly baked puff pastry, et viola! That way I can control each component of the dish. When you take the same ingredients and try to perfectly cook them wrapped in puff pastry, you're adding significantly to the degree of difficulty.

Having said that, I'll admit it really does make an impressive special occasion dinner centerpiece. So, maybe I'll throw logic to the wind and try and film one soon. It won't be before New Years Eve, so to hold you over, here is the irrepressible Gordon Ramsey doing his Christmas version. Enjoy!

Tuesday, December 28, 2010

New Year's Eve Menu Idea: Stuffed and Rolled Pork Tenderloin with Dijon Pan Jus

Yesterday's Pork Diablo recipe reminded me of this Stuffed and Rolled Pork Tenderloin recipe I posted over three years ago. This is one of my favorite recipes on the entire blog, and when I saw it only had 14 comments I realized that many of you might not have seen it yet.

It's funny to see and hear how the videos have evolved. This is some very early work, and was shot with a tiny web cam. There's no music, the sound sucks, and the video rambles on for over 8 blurry minutes. That said, there is a certain charm to it, and I got a kick out of watching it today.

Like I said, the recipe is a favorite, and one of my go-to special occasion choices. It looks very cool, is relatively easy to pull off, and scaled up would work nicely for a large table. To view the recipe, click here to go to the original post. Enjoy!

Please Note: Updated internal temperature for this is 155 degrees F. (I like to go higher than 145 because of the stuffing). The video says  internal temperature of 165, but I've since gotten my head right.

Monday, December 27, 2010

Pork Tenderloin "Diablo" – The Devil is in the Details

This roasted pork recipe is the first meat dish I remember learning in culinary school. It was demonstrated by a German chef at the Hotel Saranac, and when I asked why it was called "Diablo," he said because that means "devil." Um, thanks. 

Eventually I learned that "Diablo," referred to the old-school culinary terminology for something spicy being, "deviled." Back then entrée's had names. Dishes like Beef Wellington, Clams Casino, Steak Diane, Lobster Thermidor, and this Pork Diablo, would be proudly displayed across menus in bold font, followed by the chef's brief description.

Nowadays, naming a dish just isn't as fashionable, so all we get is the description, and a lot of it. Maybe we're compensating for no longer giving the recipe an official title, but these descriptions tend to go on forever, and give way more detail than necessary, including what farm the Brussels sprouts came from, and at what angle the pork will be sliced.

One of these days I fully expect to see, "rosemary sprig was picked left-handed, by a guy named Pete." I hope I don't sound too curmudgeonly, but I kind of prefer the way we used to do it. There was a bit more formality to it, and just the right amount of mystery. Today's menu descriptions don't leave anything to the imagination. [Insert burlesque analogy here].

Regardless of how you choose to communicate it on your menu, this is a great pork recipe. Mustard is a classic with pork, but when you add the extra zing of horseradish and cayenne, and then smooth it out with a little cream and butter, well, it's devilishly delicious.

As I mentioned in the video, the great thing about pork tenderloin is it's one of those versatile cuts of meat that's fancy enough for a New Year's Eve dinner party, but also works equally well as a simple and quick weeknight meal. 

By the way, if you've watched our older pork tenderloin videos, you'll notice I used to cook the meat to a higher internal temperature. Since all the old cookbooks say to cook pork to 185 degrees F., I felt like a real renegade only cooking it to 165. Now, I'm a believer that somewhere closer to 145 is perfect.

And by "perfect," I mean juicy, flavorful, and able to be cut with a fork, and you'll see in the final climactic scene. I hope you give this Pork "Diablo" recipe a try soon. Enjoy!


Ingredients: (make 2-3 portions)
1 pork tenderloin, trimmed
salt and fresh ground black pepper to taste
1/2 cup chicken broth
1 tablespoon extra hot horseradish
1 tablespoon Dijon mustard
1/4 teaspoon cayenne pepper
2 tablespoons cream
1 teaspoon fresh chives
1 tablespoon cold butter

Friday, December 24, 2010

Wishing You a Very Merry Christmas!

Ornament Photo (c) Elin B's Flickr Photostream
Michele and I are heading up to Bodega Bay today for Christmas with the family, but before we do, we wanted to wish all of you who celebrate, a very Merry Christmas!

I hope you'll also be surrounded by loved ones, and of course, lots of great food. The holiday table is the perfect reminder of what an amazing effect home cooking can have on the people around you.

We'll be taking a little break from the blog until Monday (I may actually try to go a whole day without looking at email, but we'll see about that one). Have fun, play nice, travel safe, and as always, enjoy!!

Thursday, December 23, 2010

Brussels Sprouts Roasted with Cipollini Onions – Warning: Takes Longer than 60 Seconds

As many of you know, I also do recipe videos for About.com, but what you don't know, and would probably never guess, is that out of all the recipes I've produced for them, the most popular is a Brussels sprouts dish!

It's called 60-Second Brussels Sprouts, and you can see the original post here. As the name suggests, the recipe calls for a super-fast sear-and-serve approach. Here, we're at the other end of the spectrum. These actually get cooked twice, and for a much longer time.

The secret here is a quick blanching in boiling salted water, and then 15 or 20 minutes in a really hot oven. The searing heat and natural goodness of the vegetables do most of the work, so nothing more than a little brown butter and seasoning are needed.

This would make a very nice side dish to your holiday feast, and I can't think of a main course, especially one made from some type of succulent animal, that this wouldn't pair wonderfully with. If you can't find the Cipollini onions, just use pearl onions, or you can just leave them out altogether.

By the way, the Brussels sprouts only need a couple minutes blanching to prepare them for the oven, but the Cipollini onions should be cooked almost to the point of being tender before being roasted. You want that nice mellow, sweet onion flavor, not something sharp and jarring to the palette.

I hope if you have more that 60 seconds, you'll give these a try. Enjoy!


Ingredients:
1 pound Brussels sprouts
1/2 pound Cipollini or pearl onions
2 tablespoons butter
salt and fresh ground black pepper to taste

Tuesday, December 21, 2010

Take a Little Break from Christmas Shopping and Vote!

You're out there shopping, stressed, tired, hungry, and at your wit's end. Why not take a break, and go vote in the 2011 Tasty Award's Viewer's Choice Award? How will this help you? It won't, but it would be really cool if you did it anyway.

As some of you may know, I'm nominated in the "Home Chef in a Series" category, so if you would like to help, please click here to vote! It's the fifth category. Thank you so much!

Recipe Rifle is on holiday


I mean, if you call being ill and the size of a house a HOLIDAY.

But I'll be back in 2011 with:

MACAROONS!
STICKY TOFFEE PUDDING!
HOME-MADE PASTA (MAYBE)
COMPLAINING!
A BABY!
SOME OTHER STUFF!!!!


Monday, December 20, 2010

Christmas special #13: The morning after

And so we come to the end, on the arbitrary number #13, of my series of Christmas Specials. There were going to be more, but I'm now ill *cough cough* and as good as snowed in, so more cooking is out of the question.

But I thought we'd finish sort of where we started, with a detailed guide that may be either useful or grossly patronising, depending on what state of mind you're in.

I want to talk about BRUNCH, which is something you may be called upon to provide on Boxing Day, or New Year's Day.
Newspaper colour supplements are falling over themselves to suggest that you do kedgeree, turkey soups or exotic duck salad things for your various brunches. When in actual fact, what most of us will reach for is the humble fry-up.

But I disagree that a fry-up is simple. I think a fry-up ranks next to a roast in terms of a thing that seems simple, but is in fact fiendishly hard to get right. And I know it's hard to get right because I've pretty much never been at a domestic fry-up situation for more than 2 people that's gone smoothly.

I mean, unless I'm in charge.

The trouble comes with the multiple elements of the fry-up. Every family is different; you may have a strict no-bean or no-mushroom tradition. Sauces might be utterly verboten on the breakfast table - alternatively HP and fried eggs may verily be the taste of your childhood. But the fact remains that there are a lot of things to co-ordinate and there's inevitably not be quite enough of something, or a couple of things reach the table stone cold.

So the first thing to do when you're contemplating doing a fry up for brunch, is to take complete charge. Don't let other people interfere - I mean, in the nicest possible way - unless it's minor tasks like putting stuff on the table or making tea, because only you can hold all the various timings of things in your head - no-one else. Two people doing a fry-up always equals cold beans.

Then you ought to do things in the following sort of order. This will enable everyone, including you, to sit down roughly at the same time without having to leap up muttering "butter", only to leap up three seconds later, muttering "teaspoons".

I mention the various elements of my preferred brunch fry-up but mentally delete those abhorrent to you as you go along and add in whatever else you're into (fried bread? tomatoes? black pudding? mmmm). Don't let anyone tell you that with a fry-up you've "gotta" have sausages or you've "gotta" have ketchup. Fuck them! It's your brunch.

Allow 30 minutes to get all this done - although it may take 45 if you are doing this for more than 4 people.

So here we go.

1 Fill the kettle and turn it on. Get the butter out of the fridge so it has a chance to be spreadable. Switch on the oven to a plate-warming temperature and then put in

- plates
- a flat dish for bacon/sausages
- a deep round dish for beans

2 Get out a frying pan and a saucepan, with a little oil in the frying pan. Put them both on the lowest available heat.

Some portion control advice:

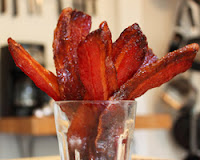
- Allow three rashers of streaky or two rashers of back bacon per person.
- (Egg advice coming in a minute)
- If you are having sausages, best dig out an extra pan to do them in. My advice is to do chipolatas, as they cook fast. Allow 3 per person. If you insist on doing big bangers, allow 2 pp and leave at least 40 mins for them to cook properly.
- Allow 1/2 a tin of beans per person. I know it sounds like a lot, but it'll all go.
- Allow 1 portobello mushroom or 1 generous handful of button mushrooms
- Allow 1 disc of black pudding pp (unless you know someone is a real black pudding fiend)
- Allow 1 fried/grilled tomato pp, cut in half

3 Get this all on the go and then congratulate yourself - you're 70% of the way to a very well-organised brunch. Celebrate with a cup of tea.

4 Leave the sausages, beans and bacon and whatever else all cooking very gently. I can't stress enough the importance of having everything on a very low or medium heat. You don't want anything to be sizzling fast and giving off billowing blue smoke - that way lies panic and burnt things. Bacon needs to cook very slowly in order to be lovely and crispy - I'm talking 20-25 minutes - because the fat needs to render and then crisp up. Chipolatas mostly don't care what's done to them but if you cook them slowly, there'll never be a situation where something's burning and scaring the pants off you.

5 Now is the critical time to dump knives and forks, mugs, glasses, milk, butter, jam, juice, sugar, teaspooons, mustard, tongs, HP, pepper, ketchup, whatever, on the table. Just pile it up in the middle any old how. Don't bother to set places. Where do you fucking live? Buckingham Palace?

6 If possible, move the toaster, if you have one, and the bread very close to the table where you'll be eating. Or on it, if there's room. Toast is a fiendish little minx and needs to jump straight onto the plate or it'll go cold and horrible. To have the toaster close to the table will cut down on that frustrating time lag between getting your fried egg and tucking in.

7 Things ought to be quite calm in the kitchen at the moment. You could give the beans a stir if you felt like it. Stare at the table and rack your brains for anything anyone might irritatingly request just as you've sat down. Marmalade? A side plate?!

As soon as the beans or anything else looks ready, transfer it to the waiting warm dishes in your oven. No element of your fry-up should ever touch a cold plate or dish. People ought to be drifting into the kitchen by now, drawn by the smell of bacon. One of them could be charged with making a pot of tea/coffee. As soon as the kettle has been emptied, fill it to the brim and get it boiling again. I know - not very environmentally sound, but reassure yourself that you don't normally do this.

8 When your bacon and sausages look done, transfer to more waiting warm dishes in oven and continue to feel *SMUG* at how prepared you are. Now take the frying pan off the heat and set about your eggs. You ought to allow one fried egg for girls and two for boys. PLEASE don't go nuts and accuse me of sexism, it's just a rule of thumb.

I would go as far, here, as to suggest that you don't attempt scrambled eggs, as however many thousands of eggs you scramble, there will never be enough to go round. I don't know why that should be, but it is.

The secrets of great fried eggs are:

1 Crack them into the frying pan while it's off the heat
2 Use a non-stick pan
3 Cook gently. The eggs ought never to make that squelching, popping sound that they do in Ghostbusters when they start frying on Dana Barrett's counter.
4 Cover with a lid to cook the egg tops, so you don't have to flip them, which always results in broken yolks and stress.

If you don't have a lid big enough to cover the pan, get the biggest one you've got and balance one edge against one side of the pan and the other against a wooden implement bridged horizontally across the opposite pan sides.

9 Now is the only point where you have to move fast. A fresh pot of tea might need to be made (but this will be a doddle as you've already filled and boiled the kettle, see?) Anyone who hasn't arrived for brunch ought to be summoned. Hot plates need to be transferred to the table and the first round of toast ought to go down. When the eggs are looking done, get someone else to transfer stuff waiting in the oven (the beans will need a stir) to the table and start dishing out eggs. Leave everyone to help themselves to bacon, sausages and beans and to ask the person who's ended up sitting next to the toaster to stick more toast on.

10 Here you may have to make a second panful of eggs, depending on how many people you're catering for. But that's okay - what with your brilliant plate and dish-warming, some people can get their eggs a few minutes later and still have all the elements of their brunch piping hot.


So that's it. The End. I hope I've made sense. If not, just copy everything off Jamie Oliver - it all works and it's all delicious. I don't know why anyone bothers looking elsewhere.

Merry Christmas, everyone. Thanks for sticking with me this year, I know I'm not always easy to have around.

A Christmas Lasagna

It only took about 300 food wishes before it finally came true, but here is my favorite lasagna. Since this is such a traditional Italian-American Christmas recipe, I figured what better time to post it?

By the way, this is simply my rendition of Italian-American lasagna, and not intended to claim any type of superiority, authenticity, or other such nonsense. If your Nonna uses fresh pasta, or insists on a béchamel, then bless her heart, but that's not how this half-Italian rolls.

There are only two things you need for great lasagna; a thick, rich, super-meaty meat sauce, and lots of it; and a ricotta filling where only the finest cheeses are welcomed. For the sauce I love a combination of half Italian sausage and half lean ground beef. I also like lots of sauce.

If you use too much sauce, the worst that can happen is you have a plate of pasta with sauce, but if you don't use enough, you end up with dry lasagna, and there's nothing sadder than dry lasagna.

For the cheese mixture I like the holy trinity of whole milk ricotta, fresh mozzarella, and Reggiano-Parmigiano. If you use the real stuff, your lasagna will taste better. I also use twice as much ricotta as most recipes, which works great here since I use twice the meat as well. Hey, this is Christmas lasagna after all. Enjoy!


Ingredients (for a deep 15" x 10" lasagna pan):
For the meat sauce:
1 pound Italian sausage
1 1/2 pound lean ground beef
8 oz mushrooms, chopped
1 teaspoon salt
1/2 freshly ground black pepper
1/4 teaspoon red pepper flakes
6 cups marinara sauce
1/2 cup water
Note: depending on the seasoning of your sausage, you can add 1/2 teaspoon of an Italian dried herb blend.
For the cheese filling:
2 egg, beaten
2 lbs ricotta cheese
8 oz mozzarella cheese, cubed
2/3 cup freshly grated Reggiano-Parmigiano
1/4 cup chopped fresh parsley
1 teaspoon salt
1/4 teaspoon freshly ground black pepper
big pinch of cayenne
The rest:
1 lb lasagna noodles
8 oz mozzarella cheese, torn in small pieces
1/2 cup grated Parmesan cheese to top

Sunday, December 19, 2010

It's Time for Michele's Famous Christmas Gingerbread Cake

My wife Michele makes this great gingerbread cake every Christmas, and in addition to being quite delicious, it's really simple and would be a perfect item to bring to any holiday party.

It has a very simple lemon glaze on top, but also works nicely topped with lemon curd, whipped cream, or vanilla ice cream.

This has been posted previously, and here is the original post in case you'd like some more information. Enjoy!

Click here for Gingerbread Cake with Lemon Glaze Recipe.
Photo (c) Flickr user terren in Virginia

Friday, December 17, 2010

This Spaghetti Aglio e Olio Recipe (Spaghetti with Garlic and Oil) Almost Left Me Speechless!

I hope this video recipe for Spaghetti Aglio e Olio looks better than it sounds! A fairly minor cold led to a few days of semi-laryngitis, but I just couldn't wait any longer, so I summoned up my best Phyllis Diller impersonation and went for it. Like Phyllis always said, "the show must go on!"

Spaghetti aglio e olio is about as primal a pasta dish as there is. This is easily the most popular spaghetti recipe in Italy, and if you'll pardon the probably-annoying-to-Italians analogy, the comfort food equivalent to our "mac and cheese."

This is a very simple recipe – in fact, the recipe is much easier to make than pronounce. You know a recipe name is hard to say when you can't even come up with a respectable phonetic spelling. It's something close to "ah-leoh-oh-leoh." Give it a couple tries, and if you can't do it, feel free to just call it garlic spaghetti.

Anyway, this is my version (no two spaghetti aglio e olio recipes are alike), and I think it's pretty true to the classic method. The key is slowly toasting the garlic slices to a perfect golden-brown in the olive oil. If it's too light, you don't get the full flavor, and if it's too dark, it gets bitter. My advice? Do it perfectly. Enjoy!


Ingredients:
1 pound dry spaghetti
salt and freshly ground black pepper to taste
6 cloves garlic, sliced thin
1/2 cup olive oil (note: I prefer a regular olive oil for this recipe, as opposed to a strongly flavored extra virgin olive oil)
1/4 teaspoon red pepper flakes, or to taste
1/4 cup chopped Italian parsley
1 cup finely grated Parmesan cheese (highly recommend Parmigiano-Reggiano)
*It's not traditional, but for extra richness add 1 tablespoon of butter when you toss with the cheese.

Christmas special #12: Performance winter salad


If you want a great, easy winter salad, see my post on Jamie's Winter Coleslaw. It's delicious and very straightforward.

This is slightly more of a performance, hence its poetic name. It's a salad I nicked off Jacob Kennedy, who is head chef at Bocca di Lupo, which is an Italian restaurant in Soho.

I was at school with Jake but I don't think I ever spoke to him, not once. I don't know why. He wasn't in any of my classes, I suppose. Anyway, he's always very friendly now - maybe he feels guilty about never having spoken to me. So I hope he'll look the other way now I've left it 12 years to copy his homework.

This radish and celeriac salad is my favourite thing that Bocca di Lupo does, which is odd for me, because usually the thing I like most on a menu is the thing that is crispiest and covered with the most salt.

I recreated it at home the other night and although it requires quite a lot of ingredients, once you've got them, you can turn this into a really massive salad and it will, I promise, impress all your friends. When you read the ingredients list you'll probably go "yuk" but honestly, honestly, this is a really exciting thing.

You will need:

1 celeriac
1 pack radishes. Little red ones, or those big black ones, if you can source them
1 pomegranate
juice of 1/2 a lemon
some olive oil
some white truffle oil (from Waitrose. Not cheap but lasts for ages and comes in v useful for all sorts of things.)
salt and pepper
pecorino or manchego cheese
some rocket or arugala

1 Peel and slice the celeriac (you may only need 1/2 or a third depending on how big you want to do the salad) as thinly as you can. You may want to cut the celeriac slices further into strips. Slice the radishes equally thinly. (This is basically a recipe invented to make use of a Japanese mandolin). Shave the pecorino.

2 Start the salad with a bed of rocket, then interleave the celeriac, radishes and cheese. Halve the pomegranate and then turn over and whack the back with a wooden spoon so that the seeds fall out, over the salad.

3 Dress with lemon juice, olive oil and truffle oil. Sprinkle over salt and pepper.

Goes nicely with most things, especially anything really rich.

Thursday, December 16, 2010

Why Fried Gnocchi is a Bad Idea

They say timing is everything, and that was certainly the case this morning. Due to a blur of licensing contracts, book proposals, travel arrangements, and other less-than-enjoyable administrative duties, I was in serious need of a chuckle. Well, this video sent to me via @mysticl on Twitter sure took care of that! I hope you love this guy's laugh as much as I did. This is from Webstaurantstore's YouTube channel. Enjoy!

Christmas special #11: Ginger cake


My Nikon has finally stopped working altogether, so this is the best I could do with my old Canon

I really did genuinely once believe that pregnant women were just making a bloody fuss about nothing. And then I staggered into the seventh month of my own pregnancy and realised that: IT'S THE WORST THING IN THE WHOLE WORLD.

This is what I did yesterday:

- Wake up to feeling the baby press its hands and feet - clearly simply for sport - into some really weird corners of my insides

- Stagger off to the loo. Pause in front of the mirror to do some silent screaming/hand-clawing down cheeks. Then make happy lunatic face with head on one side.

- Spend 30 minutes trying to find some clothes that still fit. Realise I have put pants on inside out. Cannot face the bending involved turning them right way around. Drive to Waitrose. Walk round Waitrose incredibly slowly, rolling from side to side like overweight, post-menopausal bag lady, from one painful swollen foot to the other, buying most of the shop. Wonder if my pale blue Nike Air Maxes are so unfashionable that they might soon become fashionable again.

- Start to leave Waitrose carpark but receive important phonecall from next-eldest sister and so park diagonally across three spaces near entrace to take call.

Her: "In answer to your question, you can get maternity pads from Boots."
Me: "Thanks"
Her: "How are you?"
Me: "FUCKING SHIT."
Her: "Mmmm. Yes. Don't worry it'll be over soon. I'm weirdly envious. Having a baby is amazing."
Me: "Whatever. I'm like a cat. I can't really fathom what's going to happen."
Her: "It'll be fine. Having a baby is fine. Although, Edward woke up at 1am this morning and screamed until six. Patrick's got the runs. He's doing poos all up the back of his nappy."
Me: "Fucking hell."

- Talk like that for a while. Get home. Put shopping away. Wave goodbye to husband, who is going out for lunch with a minor member of the royal family.

- Lie on the sofa. Consider vomiting. Reject idea. Make ginger cake. Lie back on sofa. Fall asleep to recorded episodes of Gossip Girl. Wake up at 5pm as husband comes back, stinking of booze and Agent Provocateur. Greet him coldly. Swerve attempted hugs. Feel partially mollified by excellent gossip he has brought home, like a cat dragging in a sparrow.

- Make dinner. Go to first NCT class. Lie about my thoughts on pain relief during labour. Leave NCT class, swearing never to go to another one. Make exasperated lunatic face by sucking in cheeks and dilating nostrils and eyes.

- Get home. Pick huge fight with husband prompted by tasteless joke made in NCT class, find myself standing at one end of the kitchen, hurling cocktail sticks at him, which he fields. Drink large glass of red wine and eat leftover cold dinner and a slice of ginger cake. Feel bilious. Go to bed. Have neurotic dreams about being given 0/10 for an essay for the NCT class and then telling the teacher to go and fuck herself, but then getting stuck in the door because too fat.


At least the ginger cake turned out really well. A reader alerted me to the niceness of this as a home-made thing. It's a cross between Jamaican Ginger Cake and Golden Syrup Cake (that come in those foil packets, know the ones I mean?) only lighter and more velvety.

This qualifies as a Christmas Special post because it's a seasonal alternative to fruit cake, which not everyone is that crazy about. And when I say everyone, I mean ME.

It's also a doddle - the only fiddly bit is getting the golden syrup and treacle out of the tins without glueing yourself to the kitchen floor.

[NB a reader (below) has alerted me to the trick of submerging the tins in warm water for a moment or two to loosen up before spooning out.]

Anyway, here we go:

Stem ginger cake with lemon icing

This will fit a cake tin roughly 22cm across and 7cm deep.

225g self-raising flour
1tsp bicarb soda
1 TBSP ground ginger
1 tsp ground cinnamon
1 tsp ground mixed spice
115g butter, cubed
115g dark muscovado sugar (or dark soft brown sugar, or light brown sugar, doesn't matter really)
115g black treacle - US readers can sub molasses
115g golden syprup - US readers can sub corn syrup
250ml whole milk
85g preserved stem ginger, sold in Waitrose in a jar, labelled as Chinese stem ginger. Find it near the jams and marmalades.
1 egg

1 Preheat oven: fan 160C, normal 180C

2 Assemble flour, bicarb soda, and spices. Either sift or put in bowl and give a swizzle with a whisk.

3 Cut butter into dry ingredients and rub into flour. Yawn. Quite boring.

[NB a reader has suggested that you can melt the butter along with everything in Instruction 4 and you get the same result without tedious rubbing-in]

4 Heat sugars, syrups and milk together in a pan gently until all melted. Don't worry too much if you over-scoop and get a bit too much of either syrup or treacle into the pan because you can't get it out again and so there's no point in fretting.

5 Chop the preserved ginger as finely as you can be arsed to and add to flour. Pour warm sugars over flour. Mix with wooden spoon and then crack in egg and continue to mix thoroughly. Mixture will lighten in colour just perceptibly.

6 Pour into tin (greased and lined if you're feeling holy) and bake for 50 mins.

For the icing

50g icing sugar
finely-chopped zest and juice of one lemon

1 Add lemon juice to icing sploosh by sploosh until you have a just-runny icing that is still opaque. Add zest. Drizzle or spread on cake. I used one of my new clear squeezy bottles, which was brilliant fun - a shiny beacon of joy in my otherwise shitty life - except bit of zest occasionally blocked up the nozzle.


I just want to be thin again. Thin and drunk.

Wednesday, December 15, 2010

How to Make Horseradish Sauce and Giving the Gift of Summer

You Curb Your Enthusiasm fans may find this post, "a little saucy." First up, we have a quick and dirty tutorial for making homemade horseradish sauce. It makes me a little sad when I see someone in the market buying a jar of horseradish sauce. 

You know I have nothing against the convenience of using the occasional prepared sauce, as a good jar of marinara or carton of organic broth can save hours in the kitchen.

However, a cold sauce like this only takes minutes, and the results will be noticeably superior to even the least picky. It will also include about 12 less ingredients. If you are doing a Prime Rib, or other roast beef, you may want to seriously consider whipping up a batch of this classic horseradish sauce.

As I mention in the video, sour cream is the standard base for this sauce, but if you can, I recommend trying some crème fraiche. Most big grocery stores will carry it, usually in the cheese department. It's basically the same thing as sour cream, but a little richer and slightly tangier. You can also make you own, which I demonstrated in this "How to Make Crème Fraiche" video.

I was fortunate enough to use a homemade batch created by my buddy Jesse, from Beer and Nosh. He was selling these at the New Taste Market, where Michele debuted her SFQ barbecue sauce (see next item). It was awesome, and reminded me just how great crème fraiche is. Enjoy!

Giving the Gift of Summer

This is your last chance to order some SFQ – The Original San Francisco-Style Barbecue Sauce. If you get your orders in by Saturday, Dec. 18th, Michele will be able to deliver your sauce before Christmas.

I know what you're thinking – sure, some of the world's best barbecue sauce would make a great gift during grilling season, but why give this to someone in the dead of winter? 

Because, it will make the recipient think of summer, and sun, and fun, and hey, I can't believe she's wearing that bikini, and put some more beer on ice, and who's up next in the horseshoe pit, and do we have time for another rib before the baseball game comes on, and…well, you get the idea.


How to Make Horseradish Sauce

Ingredients:
1/2 cup sour cream or crème fraiche
1/4 to 1/2 teaspoon fresh lemon juice
pinch of cayenne
2 teaspoon thinly sliced chives
2 tablespoons extra hot pure horseradish (not horseradish sauce)

Christmas special #10: Roast potatoes


Photo by Elena Heatherwick
 

There are two really key elements to getting roast potatoes right. And when I say right, I mean crunchy and brown on the outside and fluffy and creamy on the inside.

The first is to use the right kind of potato. You might be rolling your eyes at this, but I have met otherwise very good cooks who don't know what you need to use a floury potato for roast potatoes. I simply can't assume anything.

So, you need to use a floury potato, as opposed to a waxy potato. If you use a waxy potato for roasting you will end up with a tray of small, brittle cannon balls.

But what is a floury potato? In the shop, they will be labelled King Edward, Maris Piper or Desiree. If you are going to the shops for your floury potatoes and don't know off the top of your head which one you're supposed to be getting, write it down - because it won't say "floury" or "waxy" on that label thingy and what will happen is that you will get there and suddenly forget and be baffled by choice and I guarantee you will come home with the wrong potatoes.

I, personally, would allow 2 large or 3 smaller potatoes per person, because one should always overcater, especially when it comes to carbohydrate.

The second tip for good roasties is to par-boil them properly. Ideally, if you can, steam them rather than par-boil them in water. If you don't have a steamer, you can fashion one out of a colander and some tin foil for a lid. If this just seems like too much of a hassle then just boil them for 6-7 minutes.  But steaming does, I promise, make a huge difference.

So here we go. Some recipes say to use butter or olive oil to roast your potatoes - but I say that really is for vegetarians only. Use duck or goose fat for best, driest, crunchiest results.

Roast potatoes (with thanks to Jamie Oliver)

1 quantity of floury potatoes
1 or 2 tablespoons of fat
1 bunch sage
2 large cloves garlic, roughly chopped (optional)
salt and pepper

1 Peel the potatoes and cut each into six - or four if you want them bigger and aren't as much of a crunch fiend as me. Rinse under a tap to get rid of the starch and then parboil for 6-7 minutes or steam for 20-25. What you're looking for is some give around the edges of the potato, but still basically raw inside.

2 Once they're done, rattle the potatoes around in whatever container they were cooking in to rough up the edges. Leave to cool down for about 10 mins.

3 Meanwhile, turn the oven on to 190C and bung in a baking tray with 2 tablespoons of fat in it to melt. Once that's melted, put in your potatoes and then shift them around carefully to cover in the fat. Season generously - two or three big sprinkles of sea salt and eight twists of the pepper grinder - and bake for 30 mins.

4 After 30 mins, check out the fat situation. There should be about a 1-2mm layer in the bottom of the pan. If there's more than that, pour it off. Now take the back of a spoon or a potato masher and very gently press the potatoes. What you're looking to do here is increase the roughness of the edges and the surface area so you get a lot of crunchiness. You're not looking for mashed potatoes. If this kind of thing freaks you out, it's not essential, so give it a miss.

At this stage you may well feel a bit despondent about your potatoes. You might look at them and think "soggy". But don't worry - they'll turn out okay.

Again, carefully rearrange the potatoes around in the fat to re-coat and sprinkle over sage and the garlic. I'm not actually too sure about the garlic. My husband says they're brilliant garlicky, but if you're not certain about introducing such a strong Frenchie flavour into your Christmas lunch/dinner, leave it out and they'll still be delicious.

5 Stick the tray back in the oven for 40 mins, but keep an eye on them and open the oven door to have a look after 30 mins.

You can leave these to drain on greaseproof paper if you like, but I didn't find it neccessary with mine.

Tuesday, December 14, 2010

Coming Soon: Spaghetti Aglio e Olio

Interlude: best kitchen kit shop ever.


Last night I went to a professional catering shop on Shaftesbury Avenue called Pages and it was like a magic kingdom.

They stock things in there that I've only ever heard about, like sugar thermometers, and there are stacks and stacks of pans and trays and boxes and deep-fry baskets in 5 different sizes and 6 six different sorts of kitchen timer and huge, plastic, colour-coded chopping boards and industrial-sized pouches of white peach syrup for bellinis.

I went sort of crazy and bought myself:

- a thermal teapot, which I've been wanting for ages because a ceramic teapot is all very well and jolly but the tea goes cold and I think tea cosies are ridiculous
- three of those squeezy clear bottles for storing salad dressings and drizzling icing (which you cannot buy anywhere else, for love nor money)
- a medium-sized aluminium roasting tray
- the most amazing kitchen timer you've ever seen that does hours and minutes and seconds, four different timer settings and a bleeper that could wake the dead
- some tupperware (because you can never have too much)
- an extra pair of tongs (ditto)
- and a heavy-duty flour dredger. I had a crappy plastic flour dredger and even in its crappiness I used it a lot, so I felt like it was time I went pro with my flour dredger.

Forget everything I ever said about getting things from John Lewis. Go directly to Pages, 121 Shaftesbury Avenue, or you can buy online from their excellent website.

Christmas special #9: Mince pies


Photo by Elena Heatherwick


It really is very Stepford to make your own mince pies, so this one is for home baking enthusiasts only. Or for anyone who basically never, ever sees their family or does any cooking and is desperately trying to over-compensate.

Anyway having said all that mince pies are really easy. I do my mince pies in a slightly controversial way, in that I make them quite small and I make them with puff pastry and not shortcrust pastry.

I'm sure you all know the difference, but for any newcomers, puff pastry is like what vol-au-vents and savoury pie toppings are usually made off - sort of flaky n stuff know what I'm saying? And shortcrust pastry is what you get in a quiche, or on top of a fruit pie.

You can make up a quantity of puff pastry using Hugh F-W's recipe, which I've written about, with photographs, in this post: http://reciperifle.blogspot.com/2010/11/mrs-corens-chicken-pie.html

That makes quite a lot. Even though you can just wrap up the leftovers and put in the freezer for another time, if you don't want that much puff pastry hanging about, then make it in half or even quarter quantities.

To assemble the mince pies you will need:

1 fairy cake tray
1 jar of mincemeat - I get mine from WAITROSE - one 410g jar of mincemeat will do about a dozen small pies.
1 quantity puff pastry
pastry cutters of your choice. I put stars on mine because I put stars on everything. I even have some stars tattooed on my person - although I'm in the middle of trying to get them taken off because tattoos are just like SO over
1 beaten egg to glaze
icing sugar

1 Roll out your pastry quite thin, like 3 mm, as it will puff up on cooking

2 Grease your fairy cake tin thoroughly as what will happen otherwise is that the mincemeat will bubble up and over the top of your pastry and superglue the little buggers to the tray and you will have to chip them out with a hammer and chisel

3 Cut out with a round cutter your pie bases and settle them into the fairy cake dips, fill with mincemeat and lay the festively-shaped lid of your choosing on top. Brush with eggwash

4 Bake in a 180C oven for 25 minutes

5 Eat hot, or reheat for 10 mins before eating and dust with icing sugar.

Monday, December 13, 2010

Holiday Gift Idea: Homemade Herb Salt – Remember, You're Not Cheap, You're Creative!

Homemade, edible holiday gifts are kind of tricky. There is a fine line between giving a unique, thoughtful, carefully prepared gourmet goodie, and giving someone something that looks like it was just an easy way out. Hopefully, this beautiful looking and smelling fresh herb "finishing" salt will be seen as the former.


If this looks familiar, I did a similar version a few years ago for About.com, and since I needed a Holiday-themed gift idea to film for this year's YouTube Holiday Solution Center, I decided to give it another go.

As you'll see, I used rosemary and lemon thyme, but other hearty green herbs will also work. By "hearty," I mean herbs that are sturdy and resinous, like savory, oregano, and marjoram. Fragile herbs like dill, chervil, and cilantro, just don’t work as well.

Answers to a few common questions: Yes, the color will fade within a few weeks, but the herby flavor and aroma will remain intact for much longer. There is no shelf-life limit, and this can be kept indefinitely.

I described this as a "finishing salt," meaning it's used to season cooked food at the table; however, it can also be used in place of regular salt in any recipe preparation. So, if you're looking for a cool, creative foodie stocking stuffer, or, well, you're just cheap, I hope you give this a try. Enjoy!


Ingredients (makes about 1 1/2 cups):
1/2 cup packed fresh herb leaves (I used rosemary and lemon thyme)
1/2 cup course sea salt
1 cup regular sea salt, or a flaky kosher salt

Christmas special #8: Christmas biscuits


Photo by Elena Heatherwick. Decorations by Recipe Rifle

Another Jamie Oliver recipe. The dough quantity here makes loads of biscuits - at least 30 depending on how big your biscuit cutters are.

I decorated these using Dr Oetker's writing icing, available from Waitrose, but any writing icing, sprinkles, or silver ball decorations will do.

So here we go:

210g plain flour
pinch salt
1tsp ground ginger
1/2 tsp ground cinnamon
1/4 tsp mixed spice
1 tsp bicarb soda
125g butter, cubed
100g sugar
1 egg
4 tbsp warm golden syrup

1 Preheat oven to 190C or 180 for fan ovens.

2 Mix together the first 6 dry ingredients. I recently learnt that swizzling dry ingredients with a whisk does pretty much the same job as sieving.

3 Rub in the butter with your fingertips until the mixture is crumby then add the egg and the syrup and mix with a spoon - not a fork or a whisk or it'll all get stuck between the spikes and drive you mental.

4 You ought to have a fairly soft dough by now, depending on how accurately you manage to measure out your syrup. Too much syrup - very easily done - and you'll have to compensate with a bit more flour.

This dough at the best of times is quite soft and fragile. It breaks away and flops out of shape quite easily - so don't lose heart if you only manage to get 2 out of every 3 dough-shapes safely onto your baking tray. A useful tool to have at hand is a fish slice or any other slim, flat metallic thing to slide your shapes off the worktop.

This dough rises a bit, so best to roll it out quite thin - about 2-3mm. If you want to use these as tree decorations, poke a hole in the top before baking.

5 These biscuits are incredibly sensitive to individual oven strengths. Mine has a fan and is brand new and is a very unsubtle creature - she is the BA Baracus of ovens - and so I only needed to do these biscuits for 5 mins at 180C.

Your oven will be different. So my advice is to start off by baking one or two biscuits at 190 for 10 minutes and take it from there. What you're looking for is a nice golden colour but a still a fraction of give in the middle of the biscuit. When they come out of the oven, they will still be squidgy and will harden on cooling, so wait 5 mins before testing their done-ness.

Decorate when cool.

A note: Babies seem to go completely nuts for these, especially those teething. It's the ginger or something - and the fact that if you drool a lot over them they turn into a sort of cakey consistency. If you wanted to do them especially for a baby, you could halve the quantity of sugar, (or cut it out completely depending on how sensitive you are about that sort of thing), and then cut them out quite thick, like a rusk.

Sunday, December 12, 2010

Eight Great Christmas Appetizers

It's about time to plan your Christmas menu, and no matter how marvelous your main courses are, the appetizers need to be just as special. Here are eight of my favorite holiday entertaining ideas. Enjoy!

Prosciutto-Wrapped Asparagus
Savory Chocolate Crostini
Turkey Cocktail Meatballs
Artichoke Hearts Gratin
Candied Bacon Strips
Spinach Artichoke Dip
Clams Casino
Calabrese Lollipop

Saturday, December 11, 2010

You're a Viewer and Have a Choice: Please Vote for Chef John in the Tasty Awards!

One problem I've always wanted is not being able to keep track of which online awards I'm up for, and which contests I should be asking people to vote in. Well, my wish has come true.

As many of you may know, I was nominated for a 2011 Tasty Award in the "Home Chef in a Series" category, but I forgot to inform everyone that there is also a Viewer's Choice Award, which quite frankly is my best shot at heading down to Hollywood and taking home a trophy. So, if you would like to help make my Tasty dreams come true, please click here to vote! It's the fifth category. Thank you so much!

Friday, December 10, 2010

Lamb Caldero – A Shank that Won't Break the Bank

This lovely Latin lamb shanks recipe is the result of a little experiment I just did with the help of my friends from Imusa. You all know how much I love my Le Creuset Dutch oven, but I realize the high cost puts it over the budgets of most home cooks. So, I was interested to see how this "caldero," which costs under $30 would perform.

The model they sent me looked like a Dutch oven, but was so incredibly light that I real
ly wasn't sure how it would work. I assumed the caldero would be fine for the browning step, and it was. My main concern was would the ultra lightweight lid be heavy enough to keep in enough moisture?

To my surprise it did very well. As you'll see, we only add a cup of broth to braise the lamb, and it didn't even come close to drying out. So, if you are looking for a really light and inexpensive Dutch oven, this one performed well in regards to cooking t
he food. Of course, I can't give any opinions on the durability, and how this would stand up to normal wear and tear, but you can check online user reviews for those issues.

The recipe itself is very straightforward. You don't often see lamb cooked with these spices, and I'm not sure why, as they really work together wonderfully. The final plate ended up being a sort of North African/Central American fusion thing, with the fragrantly spiced meat and peppers resting on a simple bed of couscous.

Please note: I was using relatively small lamb shanks for this recipe. If you are using larger hind shanks, then you will need a longer braising time, probably 30 minutes more at least. Either way, I hope you give this comforting lamb recipe a try. Enjoy!

Disclosure: Imusa sent the caldero to me free of charge, and also contributed to the production costs of this video recipe. For more information on this product you can contact Imusa directly, or check out the product page here. Thanks!


Ingredients:
4 lamb shanks
salt and fresh ground black pepper to taste
vegetable oil as needed
1 onion, sliced
4 cloves garlic, sliced
1 teaspoon ground chipotle pepper
1 teaspoon ancho chili powder
1/4 teaspoon cinnamon
1 cup chicken broth, plus more as needed
3-4 large jalapeños, seeded, cut in strips
1 red bell pepper, seeded, cut in strips
1/4 cup chopped cilantro

Christmas special #7: Suppliers

Can you remember the day when you found out that life was, occasionally, going to be really really disappointing?

I can't myself remember the exact day I realised that life was going to be disappointing. I've had so many disappointing days that they all merge into one and I can't remember which one came first.

Maybe it was the day I realised that...

- however hard I diet, my hands are always going to be a little bit fat

- clothes shops do a thing where they send all their best stuff to be photographed by newspapers and magazines and then immediately sell out of whatever it is so that when you go to the shops SPECIFICALLY for it, there's not hide nor hair but you buy something anyway, therefore falling for their ruse like an idiot

-  mouthwash is not a substitute for flossing

- popstars are now all younger than me

- I am never going to be "sporty"

- I am never going to be good at maths

- that really really really amazing pair of boots will never change my life. But  I will buy them anyway

- freelancing is much harder than it sounds

- Sex and the City 2 was a simple betrayal of my long-standing support of what is generally considered to be a ridiculous television programme

- you can't force people to dump boy/girlfriends you don't like, just by shouting

- tattoos don't come off that easily

- nail varnish doesn't really suit me

- neither do pastel colours

- or lipstick

- if you go to Art 4 Fun in West Hampstead on a Wednesday, because you want to make a mug for your friend Stefanie's birthday party on Saturday, you can't, because it takes 7 days to glaze and fire. And then you have to go home despite having put £4 in the parking meter


Those are some disappointments you can't do much about. But you can limit your disappointment at Christmas by ordering stuff in advance. Because even in this day and age of plenty, stuff runs out.

I used to be confused by ordering Christmas things in advance. Why would you do that? Why would you want a turkey or a cheese sitting around in your house for a whole month? But then I realised that the idea is to ring up or go online - like TODAY, yeah people? - and either order something to be delivered when you need it, or put your name down for something to be collected.

Then on the 23rd December you can smugly take delivery of your giant Ocado order, or on the 24th December you can sweep in to a butcher, barge to the head of the queue, greet the man behind the counter by his first name, take in both hands the last goose in North West London and then sweep out again and get in your car that you've double-parked outside with the hazard lights on.

So here are my recommendations for best suppliers. These are all except one, I'm afraid, London-based because I don't know any different, but if you don't live in London and know of a good supplier, let me know and I'll add it to the list. Or if you live in London and think I've missed something out, let me know.

All of these people are very nice. If you've never bought something from a specialised supplier and are a bit nervous about it, don't be. Just ring up and say "I've got 10 people coming for lunch on Christmas Day. Can you put aside a turkey that'll do all of them?"

And they'll say "Yes. That'll be £500 please."
Only joking!!!!!!

It'll be more like £750.

For all meat, but not poultry, get in touch with the one and only Ginger Pig in Marylebone: http://www.thegingerpig.co.uk/

For meat AND poultry, pay a visit to Frank Godfrey, in Highbury: http://www.fgodfrey.co.uk/

Straddling both Marylebone and Highbury is the mighty La Fromagerie, for all your cheesy needs. Although note that La Fromag specialises in French and world cheese, so if you're looking for a Cropwell Bishop they probably won't have it. Not cheap: http://www.lafromagerie.co.uk/

For smoked salmon, go to Panzers in St John's Wood. They do two sorts - wild and farmed. The wild smoked salmon is amazing but just, like, vomitingly expensive and none of your family will really appreciate it unless you are Jewish, so just go for the farmed stuff. Perfectly ethically sound, exquisite and half the price. http://www.panzers.co.uk/

And now for my one out-of -town rec, my friend Becky B says that this year she's getting some spicy boar cocktail sausages from Sillfield Farm - http://www.sillfield.co.uk/ - I haven't tasted them yet because her party isn't until tonight but she assures me that they're jolly nice.